Set Up Access Point On Netgear Router: A Step-by-Step Guide
Are you looking to expand your wireless network coverage and improve connectivity in your home or office? Setting up an access point on your Netgear router is a great way to achieve this. In this article, we will guide you through the process of setting up an access point on your Netgear router, so you can enjoy seamless internet connectivity throughout your space.
Why Set Up an Access Point on Your Netgear Router?
A Netgear access point can help extend your wireless network and improve coverage in areas where your primary router's signal is weak. When the Netgear router acts as an access point, it allows multiple devices to connect to the network, improving overall connectivity and performance.
Step 1: Connect Your Computer to the Netgear Router
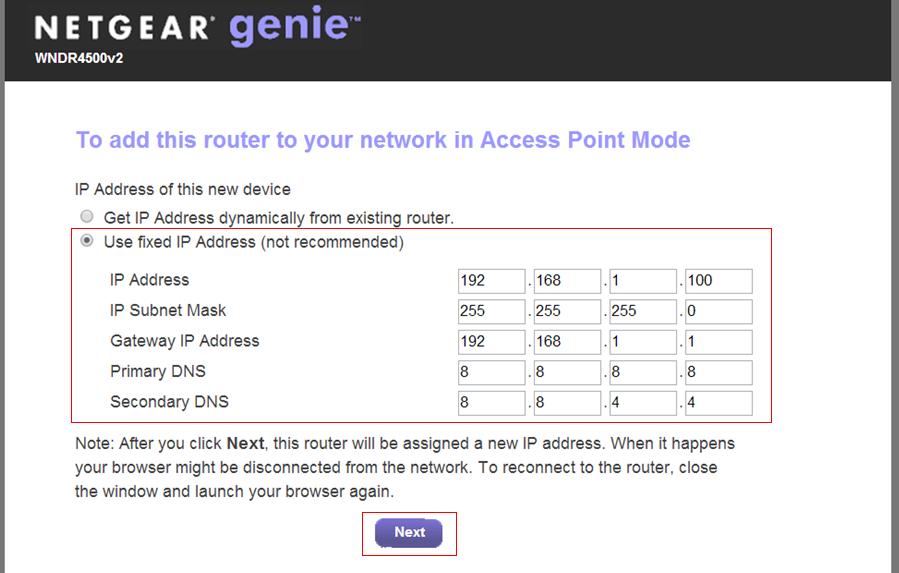
First, connect a computer to one of the LAN (not WAN) Ethernet ports at the back of the Netgear router. This will give you access to the router's configuration page.
Step 2: Access the Router Menu
Open a web browser and type in the address bar www.routerlogin.com. This will take you to the router's login page. Enter the username and password, which are usually "admin" and "password," respectively.


 - YouTube")

 as an Access Point")


- 3x1G Ports, Easy Setup, Security ...")


 Portable Mini Travel Wireless Pocket VPN WiFi ...")


