Master Your Home Network Configuration Router Settings
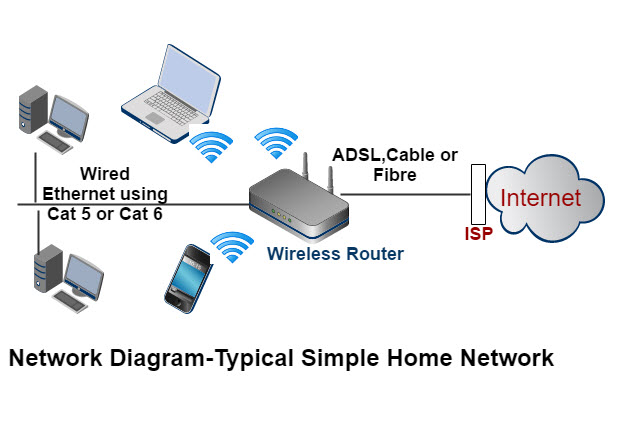
When it comes to setting up a home network, the router is the central device that connects all your devices to the internet and secures your network. However, configuring the router settings can be a daunting task for many homeowners. In this article, we will guide you through the process of configuring your home network configuration router settings, ensuring a safe, fast, and reliable internet connection.
Understanding Your Router
Before we dive into the configuration process, it's essential to understand your router's capabilities and settings. Your router is responsible for routing incoming and outgoing internet traffic, providing Wi-Fi coverage, and securing your network. The configuration settings can vary depending on the type of router and its firmware version.
Step 1: Accessing Your Router's Settings
To access your router's settings, you need to connect to it using a device with an Ethernet cable or through the Wi-Fi network. Open a web browser and type the router's IP address (usually 192.168.0.1 or 192.168.1.1) in the address bar. You will be prompted to enter the admin username and password. If you haven't changed the default settings, you can find them in the manufacturer's documentation or by resetting the router to its factory settings.
:max_bytes(150000):strip_icc()/3-5abcf226fa6bcc0036668782.png "Need to Update Your Wi-Fi Router Settings? Here's What to Do")


")

 | Vision ...")
 - HP")


/wireless-router-57ee8cea5f9b586c353f3e9f.jpg "Don't Let Hackers Access Your Home Wi-Fi Network. Here's How to Lock It ...")


![[Wireless Router] How do I enter my ASUS router's setting page using ...](https://www.theadbuzz.com/wp-content/uploads/2021/01/home-computer-network-768x516.png "[Wireless Router] How do I enter my ASUS router's setting page using ...")


![UniFi Controller Setup Guide + Performance Tips [step-by-step]](https://blog.router-switch.com/wp-content/uploads/2015/03/Network-Design002.png "UniFi Controller Setup Guide + Performance Tips [step-by-step]")

")
